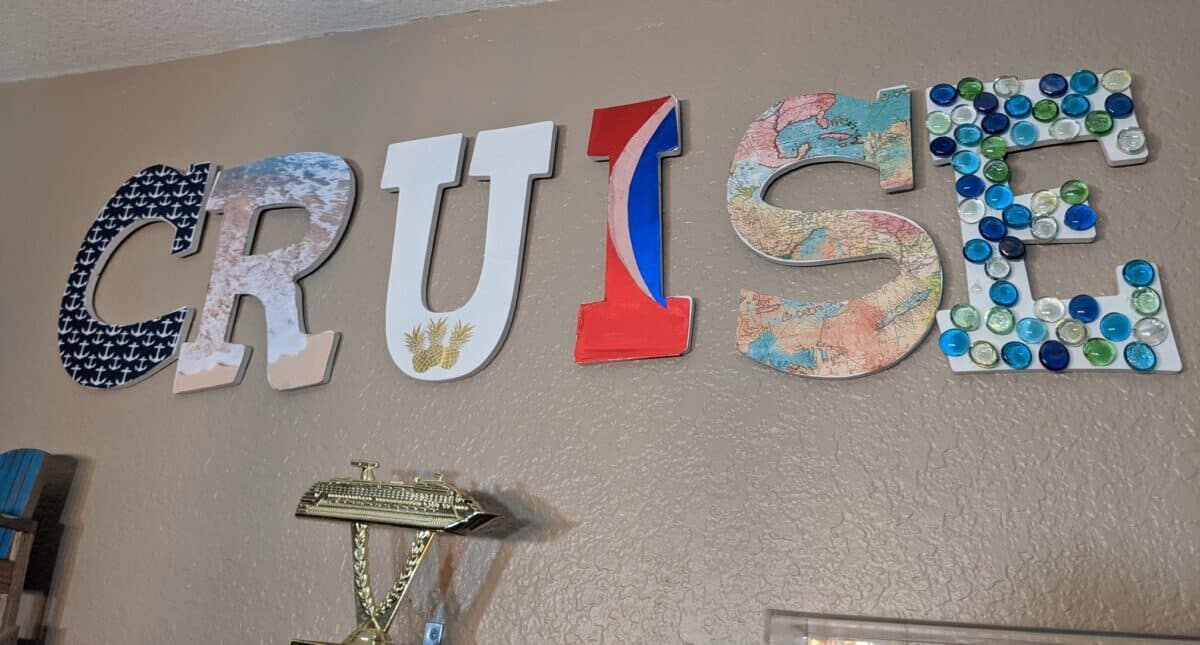
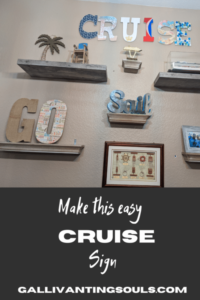
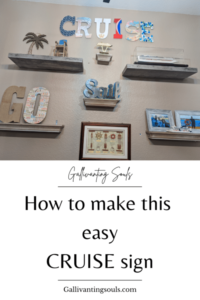
How to make a cruise travel sign to keep or gift.
Do you love cruising? Do you want to show off your love of sailing in your home décor? If so, then you’ll love this tutorial on how to make a cruise travel sign. This project is easy to follow and can be customized to your own liking or for another travel lover.
Materials and tools
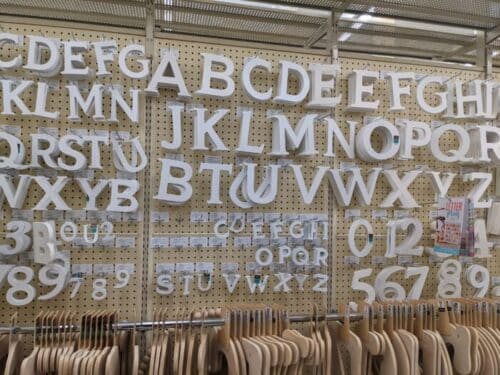
- Wooden letter (I used white wood 12-inch letters to spell “cruise”, but you can make any word you choose).
- Acrylic paint (I used Folk Art Acrylic Paint and Americana Acrylic Paint)
- Assorted scrapbook or decorative papers, stickers, and embellishments
- Mod Podge Glue
- Paintbrushes (I used disposable foam brushes so I didn’t have to wash them.)
- Scissors
- Pencil
- Tape
- Clear coat spray (optional)
- Hot glue gun
- Hot glue sticks
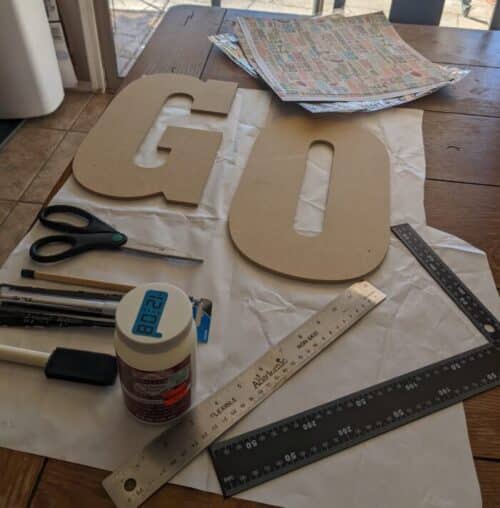
What kind of sign will you make? Your imagination is the limit!
How to make your cruise travel sign:
Making this decorative sign is pretty straightforward. Find some inspiration, whether that be a color inspiration, a pattern, or a theme. Gather your materials and begin putting your sign together.
Step by step
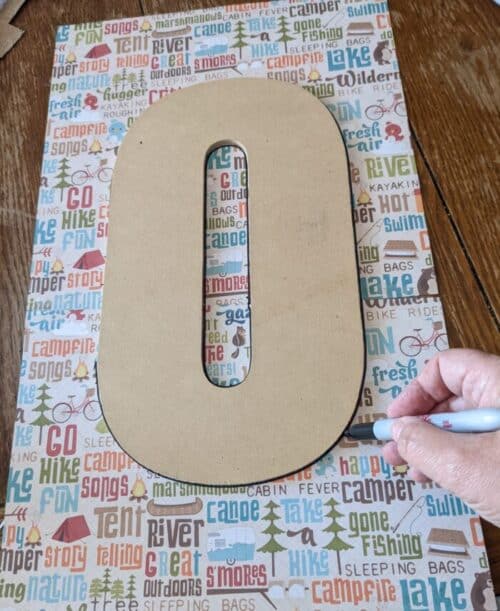
1. When using scrapbook paper, place the letter on top of your paper to make sure it fits and find general alignment. Then, flip over the paper and trace it from the back. I did this step backward and had to go back to the store for more paper.
2. Next, use scissors, cut out the letter along the line, and completely remove the lines.
3. If you are not covering the letter with paper and will be painting your letters, use two thin coats of acrylic paint. Allow the paint to dry completely in between coats. Sand if necessary. You may need to lightly sand the letters for the paint to stick, or sand to remove any imperfections in your paint job.
4. What other options do I have for covering the letters? Cut out paper shapes, or use stickers, or embellishments to decorate your letter. Consider items like buttons, glass beads and jewels, or even glitter.
5. Use Mod Podge to adhere the paper shapes, stickers, and embellishments to the letter.
6. Allow the Mod Podge to dry completely.
How to decoupage for beginners: a step by step guide
7. If desired, apply a clear coat spray to protect your sign. If using items like glitter or sand, you may want to apply this coat. Use several thin coats.
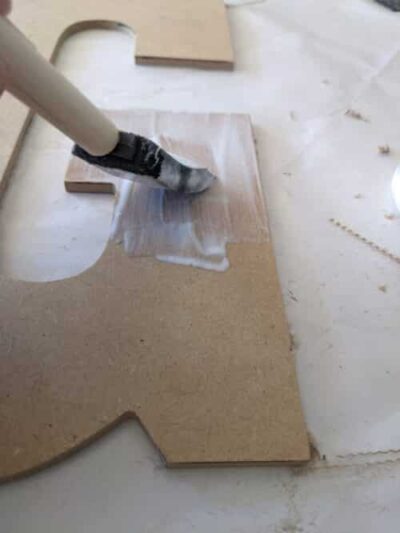
8. To adhere paper to wood, “paint” the letter with an even layer of glue or mod podge.
Tips for making your travel sign with ease:
- Use whatever colors you like for your letter and decorations.
- Have fun with the project and be creative!
- Cover your work area with a drop cloth, or newspaper, or throw away a tablecloth to protect your furniture and clothing.
How to use a hot glue gun ( full tutorial)
Putting your sign together
- Paint the wooden letter with two thin coats of acrylic paint. Allow the paint to dry completely in between coats. Sand if necessary.
- Cut out paper shapes, stickers, or embellishments to decorate your letter.
- Use Mod Podge to adhere the paper shapes, stickers, and embellishments to the letter.
- Allow the Mod Podge to dry completely.
- If desired, apply a clear coat spray to protect your sign.
Helpful glue gun tips
Tips
Always use hot glue guns in a well-ventilated area. The fumes from hot glue can be harmful if inhaled.
Hot glue can be used to adhere to a variety of materials, but it’s not always the best choice. For example, hot glue is not a good choice for adhering materials that will be exposed to high temperatures or moisture.
If you’re using hot glue to adhere to small pieces, it can be helpful to use a toothpick or skewer to apply the glue. This will help you get a more precise application.
Cautions
Hot glue can set quickly, so be sure to work quickly when using it. If you make a mistake, you can usually remove hot glue with a heat gun or a hair dryer.
Hot glue can be very hot, so be careful not to touch it with your bare hands. Use a hot glue gun with a safety guard to protect your fingers.
Hot glue can melt or burn certain materials, so be sure to test the glue in an inconspicuous area before using it on your project.
Conclusion:
This cruise travel sign is a great way to show off your love of cruising in your home décor. It’s also a fun and easy project that you can do yourself even at times when you can’t travel. So what are you waiting for? Start crafting today! But how will you decide? Will you keep it for yourself or give it away? Let me know on our Facebook page.
FAQs
1. What are some other materials I can use for the sign?
You can use any type of material you like for the sign, as long as it’s sturdy enough to hold up the decorations. Some other popular materials include wood, cardboard, and foam board.
2. What are some other ideas for decorating the sign?
There are endless possibilities when it comes to decorating the sign. You can use paper shapes, stickers, embellishments, fabric, or even photos. You can also get creative with the placement of the decorations.
3. What type of paint should I use?
Any acrylic paint will work for this project. However, if you want your sign to be durable, you may want to use a water-based polyurethane sealant over the paint.
4. How do I protect my sign from the elements?
If you want your sign to be able to withstand the elements, you can apply a clear coat spray to it. This will help protect the paint and decorations from fading and peeling. Heads up: it is not advised to keep this sign outside. It may be okay under a covered porch or inside your She-Shed.
5. How long will this project take
The amount of time it takes to complete this project will vary depending on your skill level and how much time you have to devote to it. However, it’s a relatively easy project and can be completed in a few hours.
6. How do I best keep my sign out of the elements?
If you want your sign to be able to withstand the elements, you can take the following steps:
- Apply a clear coat spray to the sign. This will help protect the paint and decorations from fading and peeling.
- Store the sign in a dry place when it’s not in use.
- If you live in an area with extreme weather conditions, you may want to consider hanging the sign indoors.
7. Where can I get ideas for signs?
There are many places where you can get ideas for signs. Here are a few suggestions:
* **Online:**
There are many websites that offer tutorials and inspiration for DIY travel signs.
* **Craft stores:**
Craft stores often have displays of travel signs that can give you ideas. (I take pictures of signs I like or want to recreate.)
* **Pinterest:**
Pinterest is a great resource for finding travel sign ideas. Check out Gallivanting Soul’s Pinterest boards for crafting and travel inspiration.
* **Your own travels:**
If you’ve been to any interesting places, you can use your own photos and souvenirs to create a custom sign.
* **Look to Instagram:**
On Instagram, you can search for hashtags related to travel signs and home decor. #travelsigns. You can even start or join an Instagram Photo Challenge.
Do I have to make a cruise sign?
NO! My sign was for travel because that’s what I like, but your sign can be anything you can imagine!
Need help to hang your sign? Check out: How to hang anything and everything on your walls.
Featured videos:
How to make a paper cruise ship
https://youtu.be/LsiutoiyhVo
DIY Kids Travel activity box
https://youtu.be/BAHR_FKIIQA
Dollar Tree road trip busy bags
https://youtu.be/Mj9Of7Dq7oo
Memory keeping traveler’s notebook
https://youtu.be/ZK1hPoAaZ78
DIY Passport and vaccine card holder
https://youtu.be/5hDNrXLo9PE
How to take better travel photos on your phone by yourself
https://youtu.be/4XvsQ39-ydY
10+ Cruise Carry-On Bag Essentials: What to Pack and Why It Matters for a Smooth Trip
Cruising is exciting, but the boarding process can be slow, and your checked luggage might not reach your stateroom for hours. That’s why your cruise carry-on bag is so important. It’s your secret weapon for the first day on board. Pack it smart, and you’ll be...
26 Things you should not bring on a cruise
Packing for a cruise? Great! But before you load up your bags with everything you think you'll need, take a minute—because cruise ships have strict rules, limited space, and some surprising banned items. Overpacking or bringing the wrong stuff can lead to...
20 Important Things People Forget When Cruising
Cruising is exciting, but forgetting essential items can quickly dampen the fun. Here's a checklist of What to not forget on a cruise to ensure you're well-prepared: Essential Documents Depending on the location you will be traveling to or the cruise line, you...
8 Cruise Gear Items You Love To Pack in 2024
Cruise Gear Essentials: A Round-Up of Must-Have Products Setting sail for your next cruise shouldn't be filled with stress. By packing smart and incorporating a few key essentials, you can ensure a smooth and enjoyable journey. This guide explores a variety of travel...
Everything you need to know about cross-packing
Embarking on a new journey, especially if you're new to cruising or travel, can be both exhilarating and a tad overwhelming. That's where mastering the art of cross-packing steps in—a straightforward yet remarkably effective technique designed to make your travel...
How to avoid mishandled baggage on planes and cruises
Gallivanting Souls is reader-supported. When you buy through links on our site, we may earn an affiliate commission. As an Amazon Associate, I earn from qualifying purchases. Learn more. Welcome aboard, fellow travelers! We know how exciting it is to embark on a new...
How to Pack Light for a Cruise: The Capsule Wardrobe
In today's travel, a 'capsule wardrobe' is the key to efficient packing. Modern explorers skip guidebooks, relying on quick online searches for personal experiences. As avid travelers, we simplify cruise packing with the transformative power of a 'capsule wardrobe.'...
How to pack for a cruise using packing cubes
Are you planning a cruise vacation but worried about the daunting task of packing? Look no further! In this comprehensive guide, we'll show you how to pack for a cruise using the game-changing tool known as packing cubes. These versatile and efficient organizers will...
Why Packing Cubes Are A Good Investment For New & Experienced Cruisers
Packing cubes are a great way to organize and expand your luggage. Here are 10 + reasons why you need to use packing cubes for all your travels and why we chose Pro Packing Cubes.
How to decorate cabin door Carnival Cruise (2024)
If you're new to cruising, you might be wondering why people decorate their cabin doors. After all, you don't do that at a hotel or guest house. But there are actually a few good reasons to decorate your cabin door on a cruise: Decorating your cabin door can help you...

